
This post picks up where I left off from part 1 and part 2 to show how I turn those ideas into something you can actually spread butter on and EAT! In true form, I’m going to create a new recipe that I’ve never made before. Using the right techniques, I’m pretty sure the end result will be great.
You may have figured out that I’m a little obsessed with healthy ingredients. I like to make substitutions like brown rice for white, whole wheat flour for white and agave for sugar. The following bread recipe is no exception, but the techniques work equally well with white flour with only slight variations to the amount of water added.
If you remember from part 2, the secrets to good bread are:
- A wet dough
- TIme
- Balancing the amount of yeast
I’m going to use all three of these techniques in the following recipe:
Whole Wheat Bread
Using 100% whole wheat flour in bread making can be a little tricky. It has a lower percentage of glutin and the wheat bran tends to puncture the bubbles. These two factors can result in a dense, heavy loaf. To help this, I’ve added a little extra wheat gluten. I’ve also added some brown rice flour because I’ve heard it helps to make a crisper crust. We’ll see!
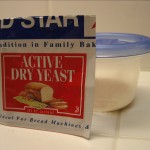
- 3 cups 100% whole wheat flour + 1 cup for use later (photo 1)
- 1/4 cup wheat gluten
- 1/4 cup brown rice flour
- 1/4t yeast active dry yeast (photo 2)
- 1t salt
- water
Day 1 (remember that time is one of the secrets?)
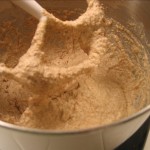
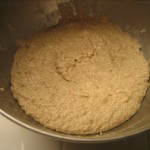
Mix 3 cups of the whole wheat flour with the gluten and rice flour. Add the yeast and salt and blend well. Add enough water to make a wet dough somewhere between regular bread dough and cake batter. If you’re using whole wheat flour it will probably take about 2 to 2 1/2 cups of water. Just add water slowly until you end up with the right consistency. I use a Kitchen Aid mixer with the paddle attachment (photo 3). You want a dough too wet for the dough hook to do anything. Scrape down the sides of the mixer bowl, spray the top with some non-stick spray and cover with a towel (photo 4). Let rest somewhere until tomorrow. I keep it in the oven.
Day 2 (or about 12 hours later)
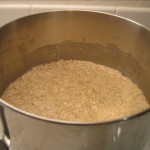
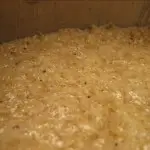
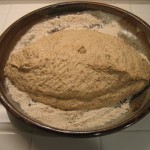
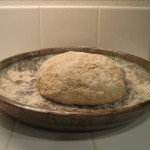
Your dough should be even looser than before and more than double in size (photo 5+6). At this point you want to gently knead in enough flour so the dough will hold a loaf shape but still be very soft. Add a good 1/2 cup of flour to your work area and pour out the dough onto the flour (photo 7). Fold the dough over onto itself until you’ve added enough flour for it to stay together in a round loaf (photo 8). Dust the top well and cover with a towel to let rise for another couple of hours.
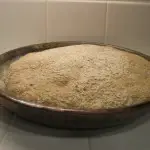
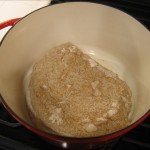
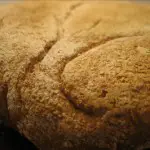
After a couple of hours you’ll have something roughly double in size (photo 9). Preheat the oven to 450F. If you have a cast iron enamed or ceramic dutch oven, put that in the oven to preheat. Baking a loaf in one of these pots has many advantages. Check out the NY Times article on this. My dutch oven is a little big so I’m going to end up with a flatter loaf, but still just as tasty. Once the pot is heated thoroughly, carefully turn the dough out into the pot and cover (photo 10). Bake covered for 30 min. After 30 min remove the lid and bake another 15-30 min until done. It should have a hollow sound when thumped (photo 11+12).
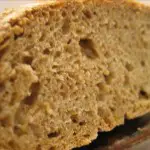
Let the finished loaf cool thoroughly on a wire rack or stove grate. My loaf was still pretty dense, but incredibly tasty (photo 13). The crust was thin and crisp. The interior was incredibly moist and chewy with irregular air pockets. Swapping some of the whole wheat flour with white flour would have helped. I love the idea of using whole wheat with nothing removed so I will probably keep making it this way.


I hope your loaf turns out as good! In the next part, I’m going to take an existing recipe and modify it to use these bread baking secrets. If you have a suggestion for a recipe to start with, post a comment. Maybe I’ll use your recipe!